Creating Sessions
Overview of Sessions
For prototyping, debugging, or analyzing, sometimes you need a live machine you can access from your laptop or desktop. We call accessing these machines Sessions.
Sessions provide a pre-configured environment in the cloud which allows you to prototype faster on the same hardware used to scale your model through Runs. You pay only for the compute you need in order to get a baseline operational, and you can easily pause and resume so you don’t accidentally run up costs overnight or during the weekend.
What can Sessions do?
Sessions are a favorite feature of many Grid users They allow you to do the following:
- Change machine instance type
- Use Spot Instance
- Mount multiple GPUs
- Auto-mount Datastores
- Work with pre-installed JupyterLab
- SSH access
- Visual Studio Code access
- Pause the session to save work and minimize expenses
- Resume where you left off
How to Create a Session
A new Session can be created through either the UI or CLI.
Using the UI
From the Grid UI, you can create a Session by selecting the New button at the top right, where you can then choose the Sessions option.
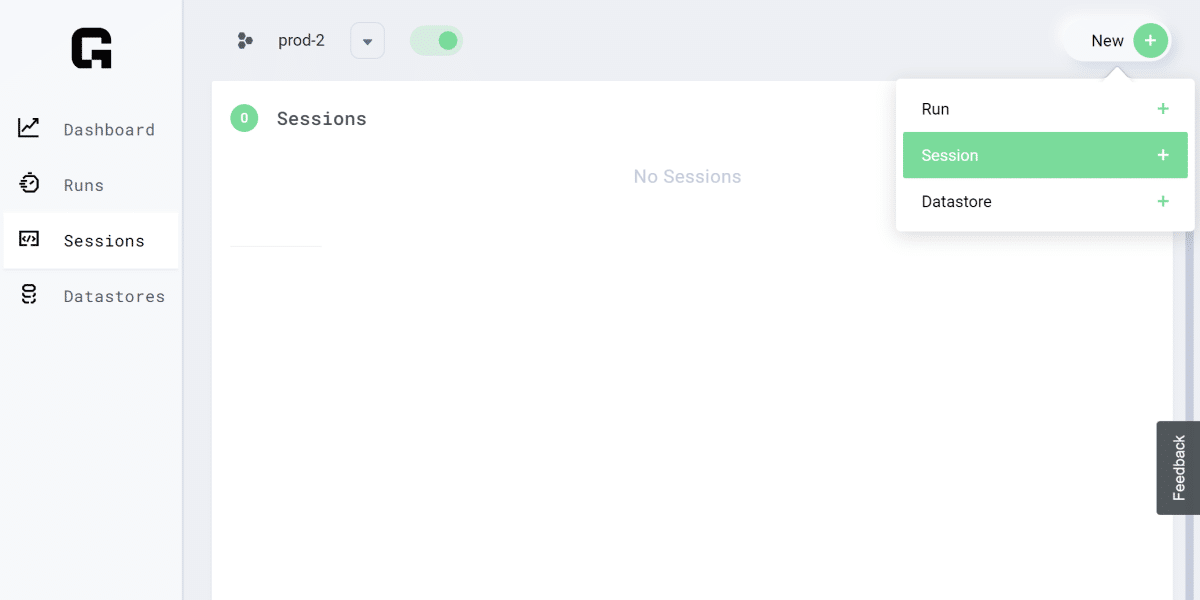
The New Session window will open and you will have the following customization options:
- Session
- Datastore
- Compute
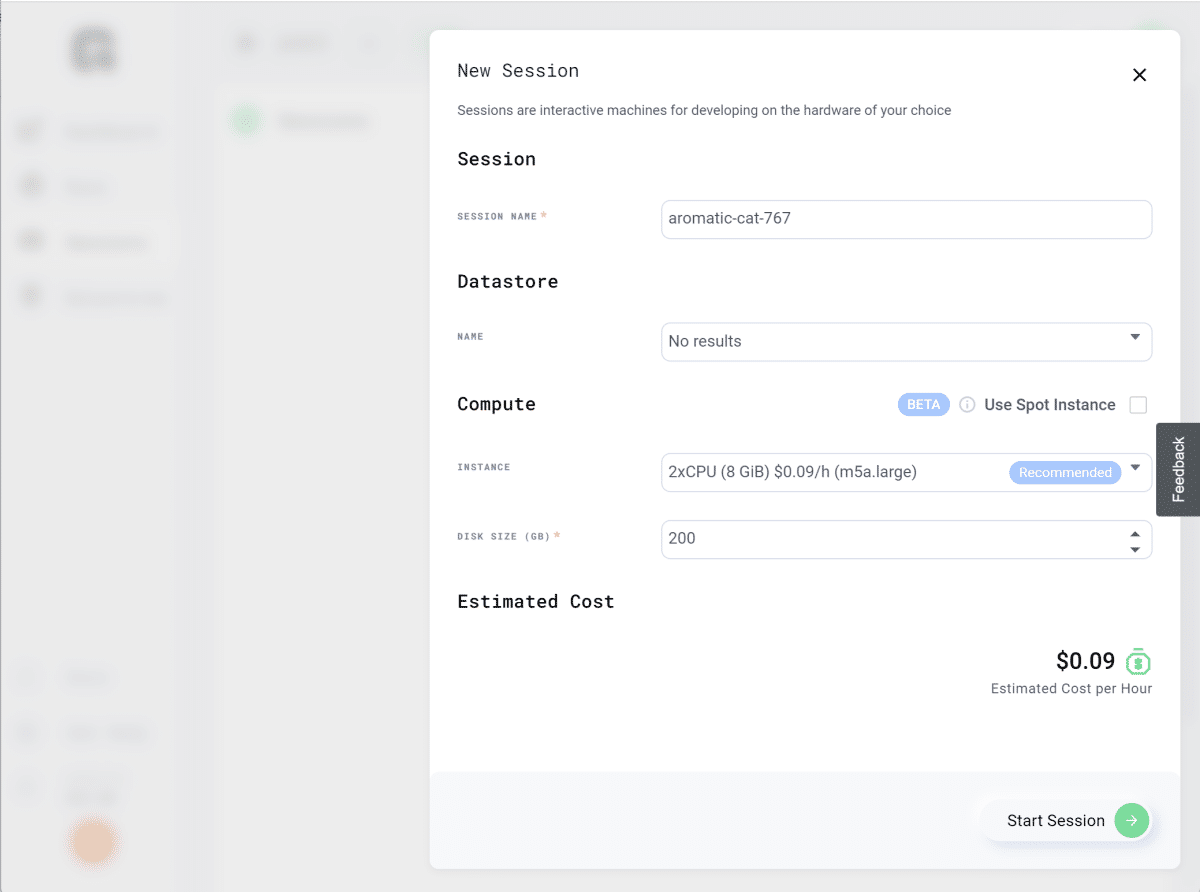
Session
The SESSION NAME is auto-generated, but you can change it if you prefer.
Datastore
If you’ve created one or more Datastores, you can then select the one you want to use from the NAME dropdown.
Compute
Now it’s time to select the INSTANCE you want to use.
This is the pre-configured cloud hardware available to you. A 2x CPU system will be used by default, but you can browse from other selections in the dropdown that include a variety of GPU instances and systems with up to 96x CPUs. Deciding which one to select will just be a question of estimated cost and how long it can take for your Session to complete.
If you have a large Datastore and expect your Session to take a large amount of time to complete, you can consider a GPU instance to get it done faster (this is ideal for processing audio, images and video). Keep in mind that you will need to add a credit card in order to select a GPU instance since the cost to run these are higher than a CPU instance.
If your job can support being interrupted at any time (i.e. fine tuning, or a model that can be restarted), then you can enable Use Spot Instance to lower training and development costs.
Finally, you can adjust the DISK SIZE (GB). By default, this is set to 200GB. Disk size is what you want to allocate to the Session in GB (Gigabytes). Increasing this number allows you more space for storing artifacts, downloaded files, and other project data, although the default setting is generally fine to use in many cases.
When you have finished with your customizations, select the Start Session button at the bottom right.
Using the CLI
You can also create a new Session using the CLI with the command:
grid session create
For example, the CLI command for the default INSTANCE Session is:
# session with default 2x CPU
grid session create --instance_type m5a.large
You can find more details on using the CLI to adjust Session settings here.
Note: If you want to change the instance type while running a Session, you will need to first pause the Session.
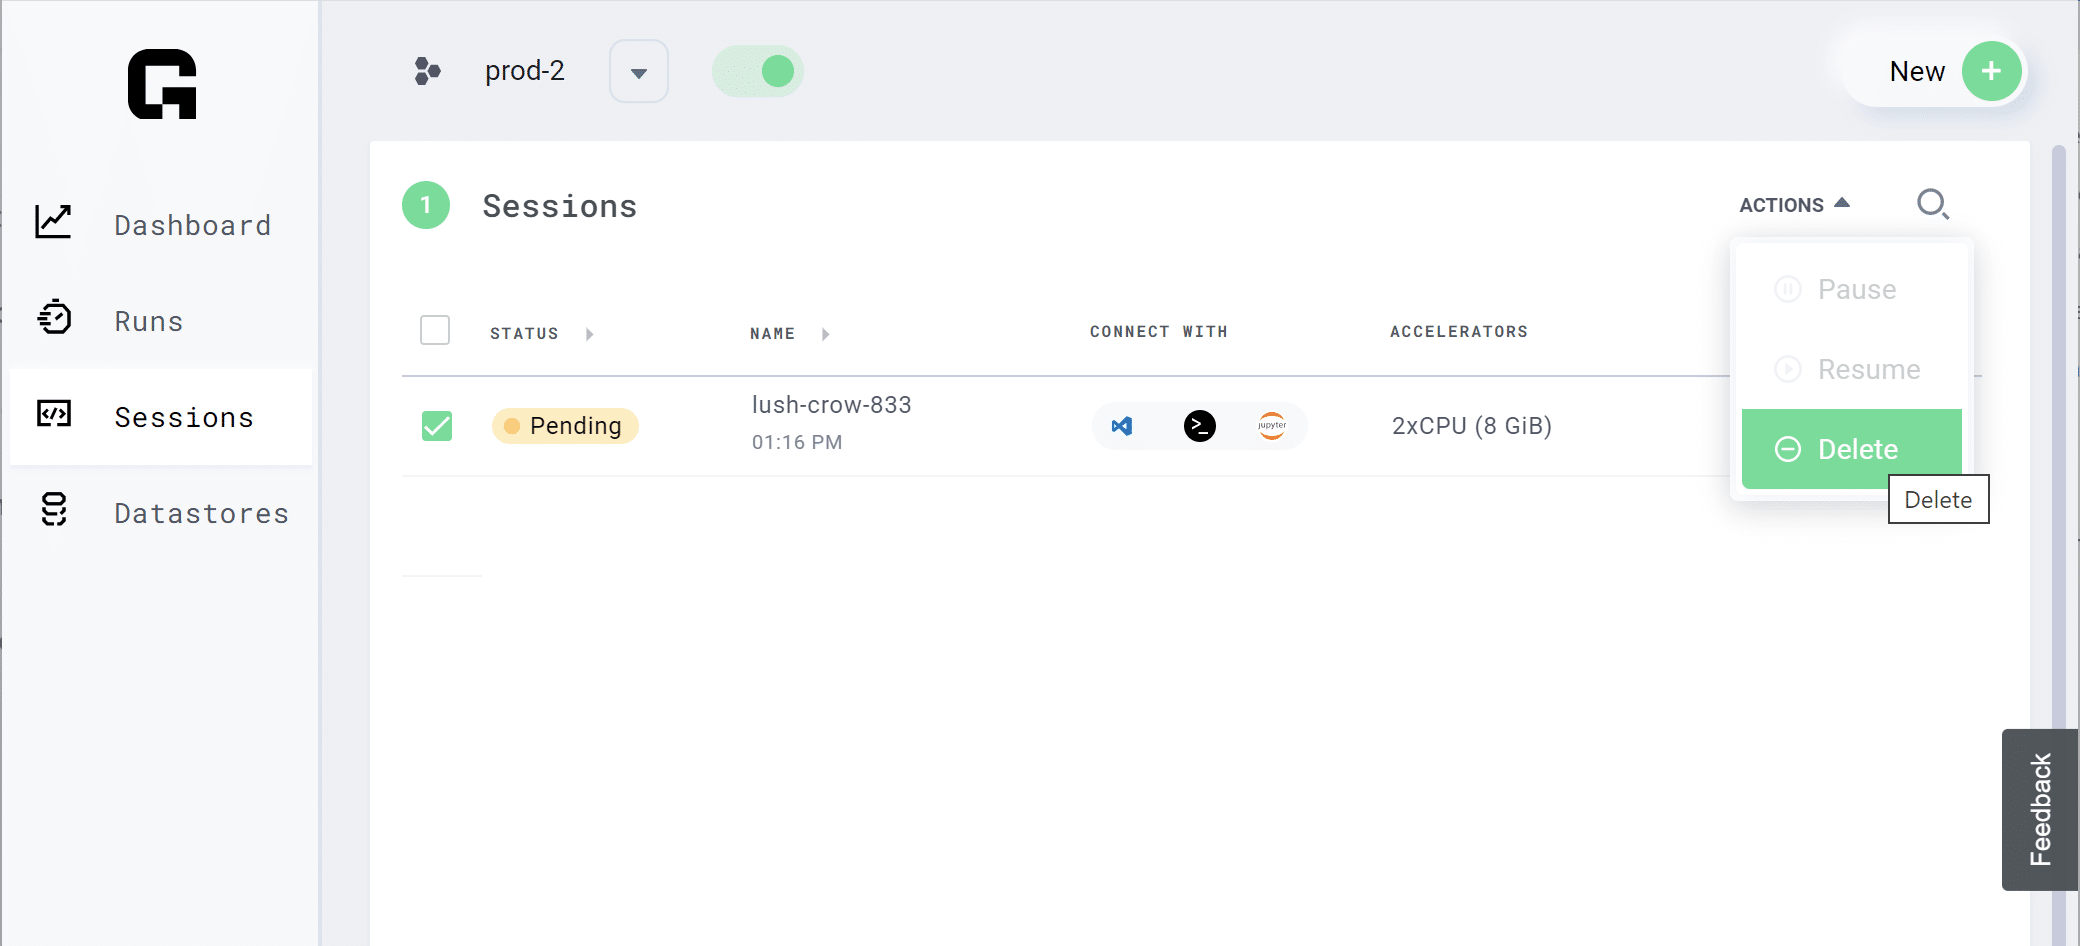
Viewing a List of Sessions
Once you’ve created a Session, you can view it in the Sessions window by clicking on Sessions from the left navigation menu.
This view shows you both running and paused Sessions.

In the CLI you can list sessions with:
grid session
In the List view, you can use the checkboxes to select one or more Sessions, and then use the options in the ACTIONS dropdown at the top right to either Pause, Resume or Delete the selections.
If you are using the CLI, you can pause, resume and delete Sessions using the following commands:
Pause
grid session pause GRID_SESSION_NAME
Resume
grid session resume GRID_SESSION_NAME
Delete
grid session delete GRID_SESSION_NAME
And that’s it for creating Sessions in Grid! You can check out other Grid tutorials, or browse the Grid Docs to learn more about anything not covered in this tutorial.
As always, Happy Grid-ing!